My role as an analyst is managing incidents end‑to‑end, escalating when needed, and often acting as the point of coordination during active events. So I wanted to walk through how an Incident Response Plan is actually used during a live incident, the practical, real‑time steps that matter when you’re the one guiding the response. Most organisations have an IRP, but very few people ever learn how to operate it under pressure. When an alert fires, when a credential is compromised, when a system behaves strangely, you don’t have time to study the document. You need to run it.
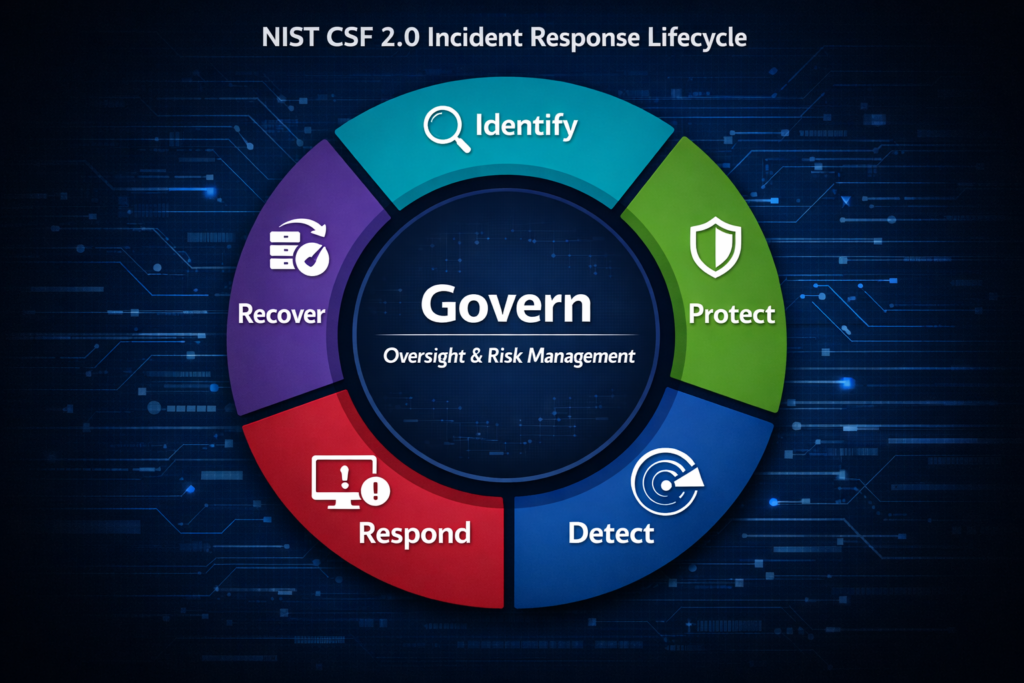
This guide explains how to use your IRP in the moment, aligned to NIST CSF 2.0, from detection to closure.
1. Preparation Enables Everything That Follows (GV.OC, ID.IM)
Good preparation is what makes the rest of this article possible. Before an incident ever occurs, organisations should already have:
- clearly defined roles and responsibilities
- documented escalation paths
- established communication channels
- implemented lessons learned from previous incidents
When these foundations exist, responders can move immediately into the operational flow once an alert fires.
2. Detect and Confirm the Incident (DE.CM, DE.AE)
Most incidents begin with one of three triggers:
- a SOC alert
- a help desk ticket
- a user report
The SOC or IT help desk performs the initial confirmation:
- review logs
- validate the alert
- check authentication activity
- determine whether the behaviour is legitimate or suspicious
Confirmation is the first real decision point. Only once the SOC confirms that something is genuinely wrong does the IRP officially begin.
3. Collect Initial Evidence (RS.AN)
With confirmation established, responders gather essential evidence:
- timestamps
- affected accounts
- affected systems
- screenshots
- log snippets
- user reports or ticket notes
This evidence becomes the foundation for triage, escalation, and war room briefings. It’s the “starter pack” the IRP Lead relies on to make fast, informed decisions.
4. Activate the Incident and Triage Severity (GV.OC, RS.CO)
Once the incident is confirmed, the responder activates it and uses the Incident Severity Matrix in Section 2.4 of my IRP to classify the severity based on the evidence gathered.
Level 1 – Low Severity
Examples:
- single compromised password
- isolated malware detection
- minor misconfiguration
Actions:
- work directly with IT
- reset passwords
- revoke tokens
- isolate the affected asset
No management involvement is required.
Level 2 – Medium Severity
Examples:
- multiple accounts affected
- suspicious lateral movement
- data access anomalies
Actions:
- notify your manager or CIO
- provide a short, time‑critical briefing
- present your notes and evidence
- request approval for containment actions
Leadership is informed, but a war room is not yet required.
Level 3 – High Severity
Examples:
- ransomware
- confirmed compromise of sensitive systems
- large‑scale identity breach
- regulatory or privacy impact
Actions:
- form an Incident Management Team (IMT)
- activate the war room
- escalate to senior leadership (CIO, CISO, CEO depending on impact)
- bring in legal, governance, privacy, IT operations, and cyber
This is where the IRP becomes your anchor. It tells you who to notify, how fast, and what information they need.
5. Form the War Room (RS.CO)
In most organisations, the “war room” is virtual:
- Microsoft Teams
- Slack
- Signal
The IMT gathers in one place so decisions can be made quickly.
Communication Protocols
To prevent chaos:
- only the incident lead provides updates
- SOC analysts do not speak directly to executives
- legal and privacy advise on regulatory thresholds
- comms drafts internal/external statements
- all decisions are timestamped and logged
This structure keeps the incident controlled and prevents misinformation.
6. Maintain the Operational Loop (RS.AN, RS.CO)
Your role as the Incident Lead becomes crucial.
Your responsibilities:
- shield the SOC from interruptions
- collect updates from analysts
- summarise findings for leadership
- relay decisions back to technical teams
- maintain the incident log
- ensure communication remains structured
Meanwhile, multiple workstreams operate in parallel:
- SOC investigates
- IT contains
- Legal assesses impact
- Privacy evaluates breach thresholds
- Comms prepares messaging
The IRP ensures these workstreams stay aligned.
7. Contain the Incident (RS.MI, PR.AA)
Containment is about stopping the spread before remediation begins. This is the moment where the IRP Lead often has to balance urgency with precision, containment must be fast, but it must also be correct.
Depending on the incident type, containment may include:
- isolating affected systems
- blocking malicious domains
- disabling compromised accounts
- revoking authentication tokens
- snapshotting VMs
- stopping suspicious processes
- restricting network segments
Containment actions must be logged and approved according to the IRP.
8. Remediate and Restore (RC.RP)
Once the threat is contained, remediation begins. This phase is slower, more methodical, and often requires coordination across multiple teams. It’s where discipline matters most, rushing remediation is one of the easiest ways to cause reinfection.
Remediation may include:
- restoring backups
- rebuilding affected systems
- reissuing credentials
- validating MFA
- reapplying security baselines
- confirming logging and monitoring are intact
Your role is to ensure remediation follows the IRP’s order of operations and that nothing is missed.
9. Return to Normal Operations (RC.RP)
Before closing the incident, you verify:
- systems are stable
- monitoring is active
- MFA is enforced
- no reinfection indicators exist
- users can safely return
- containment controls have been normalised
This confidence check matters because organisations that skip it are often the ones that experience reinfection, sometimes within hours.
10. Close the Incident (RC.IM, GV.OC)
Closing the incident involves:
- finalising the incident log
- confirming containment and remediation
- notifying leadership
- documenting decisions
- transitioning to the PIR/AAR process
This step ensures the incident is properly recorded and ready for post‑incident review.
Final Thoughts: What Running an IRP Teaches You
When you’re acting as IRP Lead, even temporarily, you realise quickly that the IRP isn’t a document, it’s a process. It’s the structure that keeps people calm, keeps decisions aligned, and keeps the response moving forward. Using it in a live incident teaches you that clarity and tempo matter more than anything else.
Continue Reading (IRP Series)
This is part of an ongoing series. If you want the full picture, the rest of the articles are worth your time.
- The Complete Guide to NIST CSF 2.0 Mappings: Functions, Categories & Outcomes (And How to Use Them)
- How to Write an After Action Report (AAR) for Cyber Tabletop Exercises
- How to Run a Cybersecurity Tabletop Exercise: Facilitator Script with Discussion Prompts
- How to Run a Cybersecurity Tabletop Exercise: A Complete Example Scenario and Facilitation Guide
- How to Write a Post-Incident Review (PIR) Report (With Real-World Example)
- How to Build an Incident Response Plan: A Complete NIST CSF 2.0 Example
- How to Write a Modern Incident Response Plan (IRP) Using NIST CSF 2.0
- The Evolution of Incident Response: Updating the Classic NIST IRP to the 2026 Framework
- How to Build a Vulnerability Management Program
- How to Build a Cyber Aware Workplace Culture
References
- Incident Response Recommendations and Considerations for Cybersecurity Risk Management: A CSF 2.0 Community Profile
- NIST Cyber Security Framework
- The NIST Cybersecurity Framework (CSF) 2.0 Documentation